
How to Fit Seat Covers - Custom Front Seats
This guide and accompanying video will show you step by step how to install
custom front seat covers.
The seat cover set used in the demo is the Esteem Velour front and rear
pack designed for the Toyota Rav4 2006-2013. The car used is the 2010 model.
In this guide we will install the front seat covers only.
1) Identify the Correct Pieces
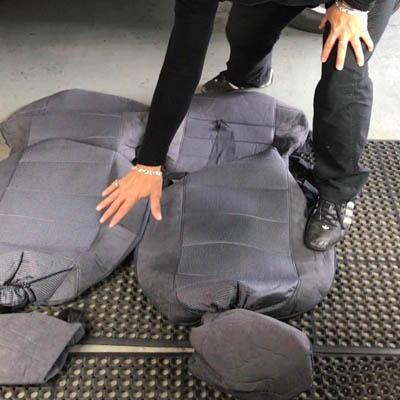
Most sets of custom seat covers are supplied with both front and rear. It is important
to first sort out the pieces you have received so you can easily identify the fronts and rear.
A front bucket seat cover is typically made from 3 pieces: headrest, backrest and base.
The front drivers side and passenger side will be identical so it should be easy to locate both sets.
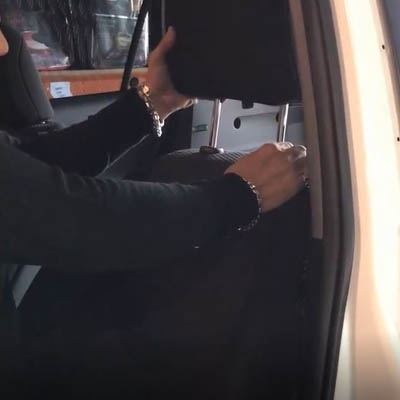
2) Remove the Head Rest
The headrest must be removed to allow the backrest to be put on. To remove, press the button
on the side of the base of the headrest.
On some vehicles, there may be a pin hole in the metal stalk of the headrest. Insert
a pin to release the headrest.
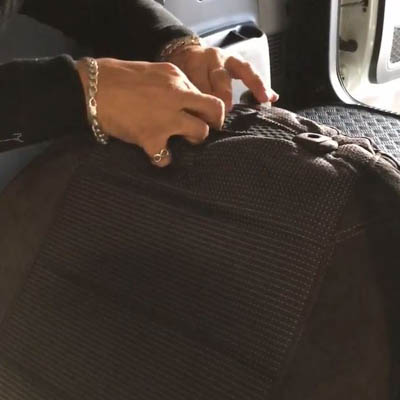
3) Put on the Headrest Cover
Slide the headrest cover over like a sock, with the velour on the outside and the stretch
fabric on the inside. Then fasten the velcro.
.JPG)
4) Put on the Back Rest Cover
Slide the back rest cover over. Open up the hole at the top to expose the plastic headrest housing.
Tuck the seat cover material underneath the housing and fasten the velcro.
5) Install the Base Cover
Slide the base cover over the seat. Ensure you tuck the seat covers behind the plastic housing,
not over it.
.JPG)
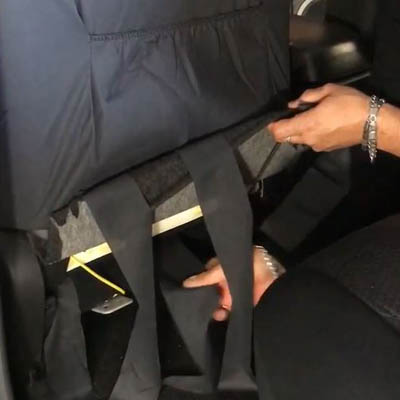
6) Tie Up the Ties
Ties should be fed through the middle of the seat and under the seat. Then tie together to secure
the seat covers.
Video: How To Fit Custom Seat Covers - Custom Made Front